
Home Improvement
The Most Common Furniture Assembly Mistakes (and How to Avoid Them)
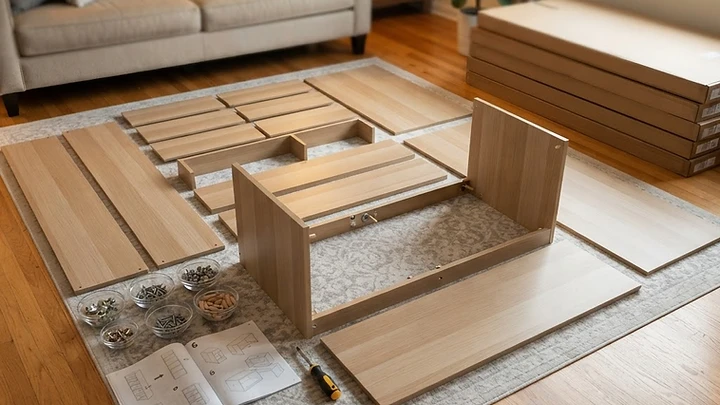
We assemble furniture for a living — beds, dressers, desks, entertainment centers, shelving, the works — which means we've seen every way a flat-pack build can go wrong. The pattern that surprises people most: almost nobody fails because the furniture was cheap. They fail at the same six or seven predictable moments, on $200 bookshelves and $2,000 bedroom sets alike.
Here are the mistakes we see most often (and get called to fix), and the honest fixes for each one. If you're assembling your own, this list will save you an afternoon. If you'd rather we handle it, it'll tell you exactly what you're paying to skip.
Mistake #1: Skipping the Inventory
The instructions start with a parts list for a reason. The single most common assembly failure starts before the first screw turns: not laying out and counting every panel, dowel, cam lock, and fastener against the manifest.
What this prevents: the classic late-game discovery — the missing cam lock that's now buried behind three assembled panels, or the mystery "extra" hardware at the end that's actually supposed to be inside the headboard. Ten minutes of inventory saves the worst hour of any build.
The fix: Open every bag, group like hardware in bowls or on tape strips, and count panels against the diagrams. Missing a part? Most manufacturers will ship replacements free — better to discover at minute five than minute ninety.
Mistake #2: Building in the Wrong Location
Second most common, and it bites the enthusiastic builder: assembling the dresser in the garage, then meeting the door frame. Or building the bed frame on the wrong side of the room.
Bigger items — U-shaped sectionals, king bed frames, tall bookcases — need to be built in or near their final room, with the path measured. Panel-by-panel transport beats a finished-piece wrestling match every time.
The fix: Before the first panel, walk the path — doorway, hallway, stairs, and the room itself. Assemble as close to the destination as the space allows.
Mistake #3: Not Reading the Sequence
Flat-pack instructions are a sequence, not a suggestion list. Panels get labeled; steps get ordered so later steps have clearance for earlier ones. The DIY improviser who skips step 4 because step 5 "looks more important" almost always earns a partial disassembly later.
The highest-stakes version: tightening hardware fully at each step. Most assemblies need some bolts left loose until the whole piece stands square — a fully tightened step-two panel locks the piece out of square permanently.
The fix: Follow the order exactly, and keep the fasteners of the current stage finger-snug until the instructions call for final tightening. Snug, square, then tight — that order is the whole secret.
Mistake #4: Overtightening Particleboard
Modern furniture is mostly engineered wood, and engineered wood has one unforgiving rule: it strips. Power drills at full torque turn cam locks into spinning cylinders and blow out screw holes with a satisfying crunch that means "this joint is now permanently loose."
Cam-lock fasteners — the round metal cylinders that grab a screw head and lock panels together — deserve special respect. They need only a quarter-to-half turn past snug. Past that, you're reaming out the hole they grip.
The fix: Use a hand driver for final tightening, or a drill with the clutch set low. If a cam lock spins without grabbing, stop — don't keep going hoping it bites. (When it's already stripped, it's a repair job — or a replacement part.)
Mistake #5: The Wrong Fastener in the Wrong Hole
Flat-pack kits include three or four screws that differ by millimeters and nothing else visually. The 30mm screw in the 25mm hole pokes through the finished surface — a beautiful oak-look bookshelf with a screw tip peeking out the side is a forever-reminder of minute forty.
The fix: Compare fasteners against the instruction diagram every single time, not just the first time. Lay the candidates side by side on the tape with their labels. When two screws look identical, measure them.
Mistake #6: Standing It Up Before It's Square
A bookcase assembled flat and raised before the back panel goes on will rack — twist out of square — and once it's racked, the back panel nails on crooked and locks the twist in forever. That's the origin story of most "leaning" shelf units: not a bad piece of furniture, a bad sequence.
The fix: Back panels and cross-bracing go on while the piece is flat or braced, and the square gets checked — diagonals measured corner to corner — before the final tightening. Level, square, anchored is the professional sequence in three words.
Mistake #7: Skipping the Wall Anchor
This one isn't about wobble — it's the safety issue, and it matters in every home with kids. Tall furniture tips over. Dressers, bookcases, and shelving are front-heavy when loaded, and a climbing toddler is exactly the force they're least ready for. Every reputable manufacturer includes a wall-anchoring kit in the box, and it's the step most skipped in the instructions.
It's the furniture version of the same physics we make the safety case for with wall-mounting TVs: anchored to a stud, nothing tips. Unanchored, everything above three feet is a risk in a home with small children — and an earthquake nobody expects even in Texas.
The fix: Use the included strap or bracket, into a stud or a proper heavy-duty anchor. On plaster, brick, or stone walls, the hardware changes — same principle as hanging heavy items on drywall: the wall type picks the anchor, always.
Mistake #8: Assembling the Wobble Away with Force
A wobbly finished piece gets one honest diagnosis: something is out of square, a fastener is loose, or a cam lock stripped. The instinct — "tighten everything harder" — usually strips more cam locks and finishes the job the wobble started.
The fix: Loosen the frame, check square (diagonal to diagonal), resnug in sequence, and add felt pads under the light corner if the floor is the actual culprit. Floors in older Granbury and Weatherford homes are rarely flat; furniture that levels to the floor stops rocking for good.
The Bottom Line
Every one of these mistakes is preventable with the same three habits: inventory first, sequence exact, snug-then-square-then-tight. That's 90% of professional assembly in one sentence. The other 10% is experience — knowing what a stripped cam lock sounds like before it strips.
If the box is still taped shut and the afternoon already looks short, that's our favorite kind of house call. Get a quote and tell us what's in the boxes — we'll assemble it right, anchor it safely, and haul the packaging away. Or read more about our furniture assembly in Granbury and Weatherford.
A Couple Studs
A family-run TV mounting and wall hanging business serving Granbury and Weatherford, Texas. One Stud Teaching the Next — every job teaches the next generation the value of doing it right.
Get a QuoteReady to Hang It the Right Way?
A Couple Studs serves Granbury and Weatherford, Texas — get your free quote.
Got a wall? We've got a Stud.
Get your free quote from A Couple Studs — professional TV mounting and wall hanging in Granbury and Weatherford, Texas.